Saturday, March 9, 2013

Painting Projects for Brooke: Bath, Studio, Kitchen, Stairwells and Upstairs Hall

So, this will be an unusual post, because it's intended for my brother-in-law, Capel's brother Brooke, who is a painter by trade, but off in eastern Mass. It's a good time of year to work on inside painting, so here are four possible projects we're going to look at working on together.

Bath - 8.5' x 8.5' and 7.5' at highest point:

This is (finally, drum roll, yay!) our attempt to finish off the upstairs full bath renovation. All of the trim and beadboard wainscot has been painted by yours truly. The top half of the room was skim coated with a plaster veneer by an amazing plasterer named Kieran, the owner of Bestwall Plastering in New Jersey. The new plaster is cured now and ready to paint. There will need to be a coat of primer and then two coats of paint. It will be eggshell blue. You can see my paint samples in the photos.

Here's a basic view of the tub and SW corner, showing how the wainscot is topped by plaster:


View of slanted ceiling, from door, looking at window in NE corner:


Then around the room panning right from the window, showing the full sink wall to be painted:


Its curved plaster wall corner (the medicine cabinet door will be on by the time you arrive, promise):
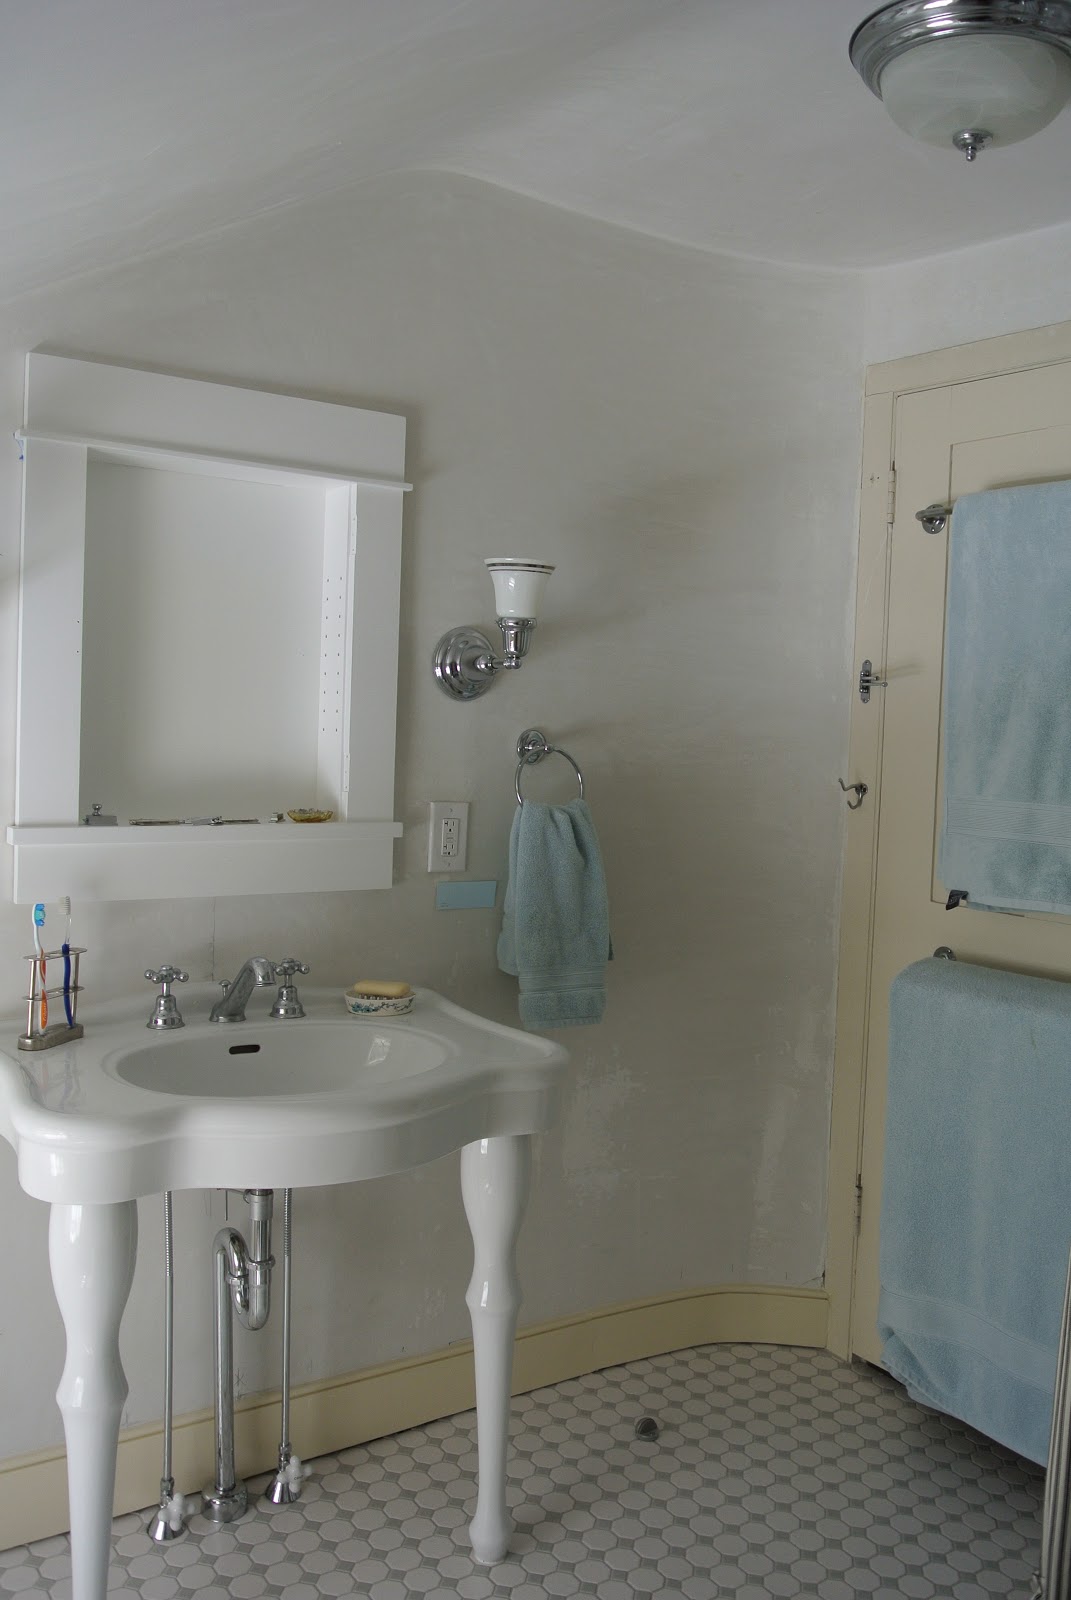

Half-wall and ceiling above tub/shower assembly (the ring can be taken down):


And then a shot trying to show how the ceiling slants down to the exterior wall, which is only 5' high and fully covered by beadboard: 


So that is the bath.


Capel's Studio - 11' x 12' and 10' ceiling at height, slanting down to 6':

This room is a lean-to addition on the back of the house, southeast corner. It leads from the living room. The ceiling here does not need to be painted. We like the way part of the trim is stained pine, and that will stay as is. The painted trim doesn't look great, though, and should be painted, probably in a glossy off-white. Capel thinks he wants pale grey walls. The new pine windows in the north wall will need to be stained and finished to match (more or less) the existing stained pine windows on the east, exterior wall.

The walls are mostly drywall, except for the former exterior wall, which is original cedar siding with what looks like two thin coats of paint.

Photos, panning around the room --

Starting at the NW corner of the room, where there is a built-in and looking at the door that goes back into the living room. This is the wall that used to be the exterior of the house and is still composed of cedar shingles:


Panning right, same wall, full shot:


Panning right, north wall with the new windows and patched drywall:


Panning right, east wall, now the exterior wall, and door to the backyard:


Panning right, north wall, and back to where we started with the built-in:


Close ups of the painted trim to be re-painted.  The bottom of the built-in:


Baseboard trim:


Door and trim:


Old window in the north wall:


Close-up of trim on existing window in the east wall:


New window in the south wall, pre-primed trim is to be painted, raw pine is to be stained and finished:


Again, existing window, sill and painted trim:


New window, sill to be stained, trim to be painted:


If you have ideas about this room, they'd be welcome.


Kitchen - 8.5' x 18.5' and 8' high:

Most but not all of these walls are plaster. Two sections are drywall, where a door was blocked off and stairs added added over the years. The wall behind the sink is covered with some sort of unknown splash guard-y substance. The wallpaper behind the stove is a vinyl wallpaper to be removed. The paint on the east exterior wall looks to be painted right over very old wallpaper. That combo has been totally melded together by time, and that old wallpaper will stay and just get another coat of paint. The new wall color will also be yellow, perhaps a slightly brighter, Provencal yellow.

None of the trim or ceiling or cupboards are to be painted (yet). This room will get renovated sometime in the next ten years, and then we'll deal with cupboards, etc.

Ok, so the kitchen is also on the back of the house, on the NE corner, opposite end of the house from the studio. I'm entering from the dining room.


And looking from the dining room door into the kitchen. The door to the breakfast room addition is in the far corner:


Walking toward the sink:
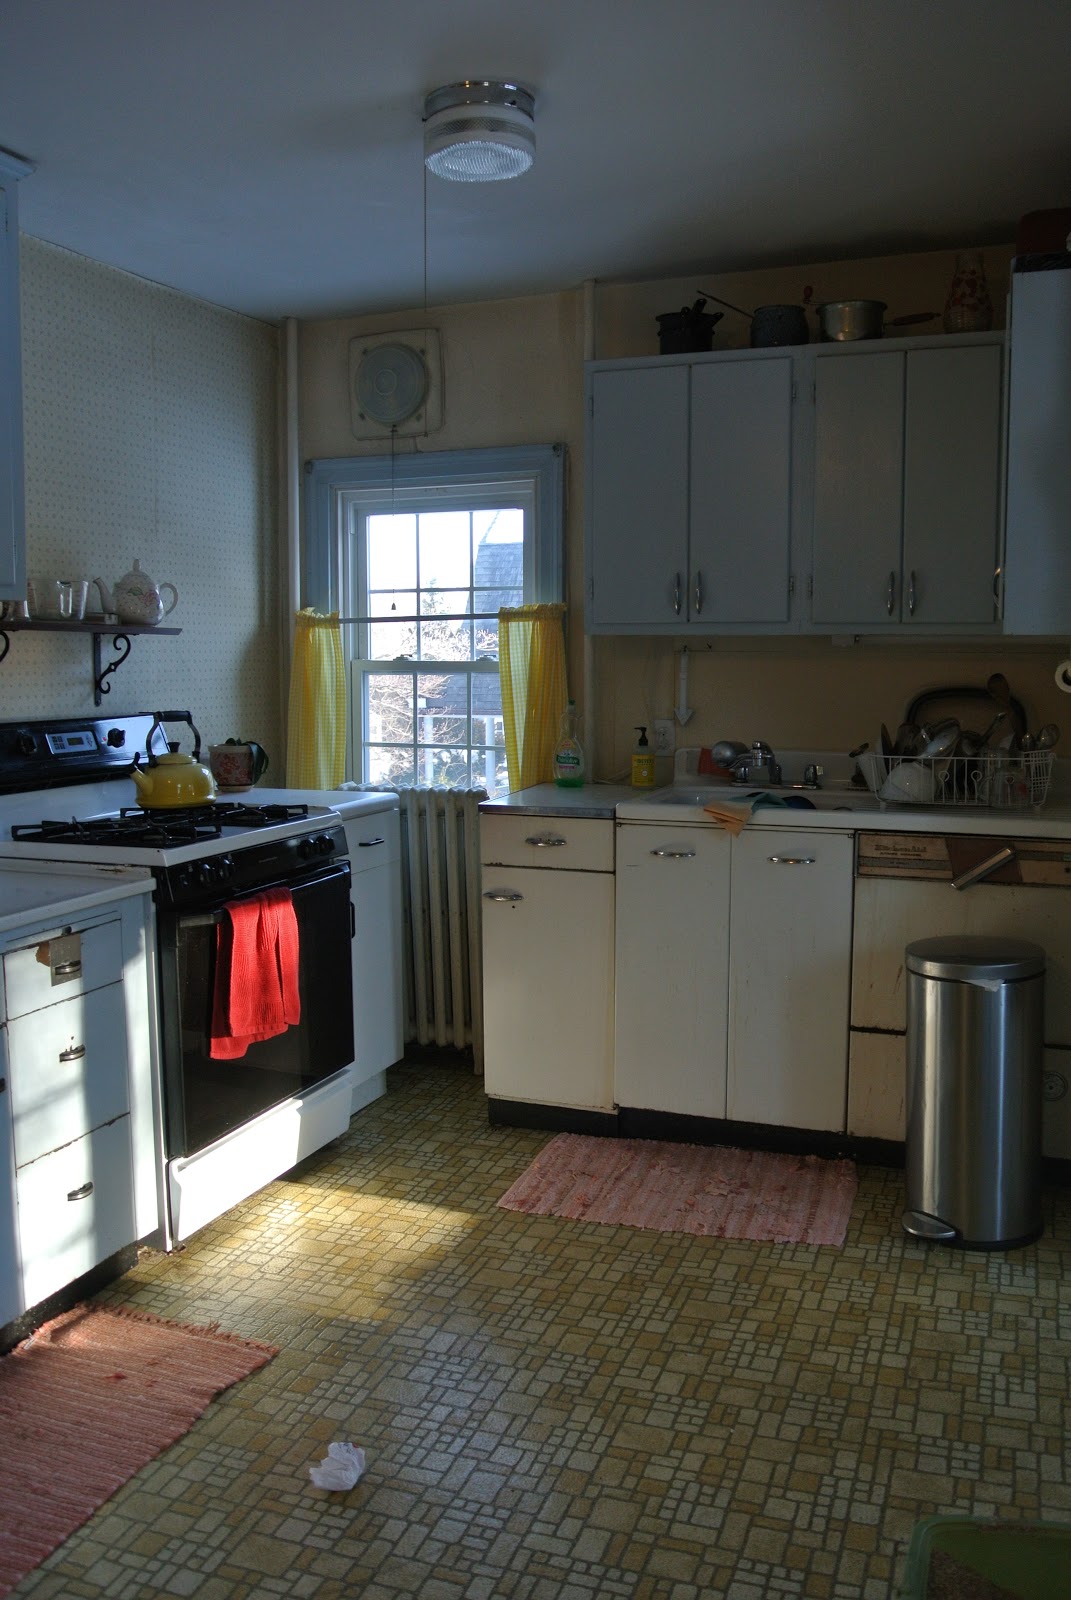

Panning left to the stove. The section of wall right behind the stove is wallpaper with vinyl paper that will need to be removed:


Here's a close-up of the wallpaper:


Now, looking back from the sink along the stove wall, towards the dining-room door. The rest of that wall is painted. There's no backsplash there, just plaster wall:


And panning left, the dining room door again, and back stairwell.


And now panning left again, the bottom of the stairwell and the exterior east wall:


Now we've gone up the bottom stair, and the full stairwell is in view:


And from the stairs, we turn, looking out over the top of the fridge, and can see the entire kitchen:


A close-up of the corner under the stair, with the door to the dining-room closed. The back stairwell is to the left, and under it is a closet:


Now, we're in that corner and you can see the closet door to the left. Here, where the closet door and trim are painted the same yellow as the walls, we probably want this yellow trim painted (what? Don't know). But it's the only trim that is not blue in the kitchen.


While we're in that corner, we'll turn around and look more closely along the stove wall, behind the lower cupboards. The lower cupboards here are free-standing and will probably have to be pulled out so the bottom half of the wall can be painted to the floor. Otherwise it will be too hokey, I think.


And finally, just a word on the "character" of the paint. It has crackling throughout in places on three of the walls. I like that character. If we do a coat or two without primer, or even a milk-paint? and the crackling comes back through in a couple of years, I'll be happy, not upset.


There are a couple of places on the east exterior wall where some old moisture and shifting has buckled a very old layer of wallpaper under the paint. This is ok. We'll want your advice, but probably not feel the need to do anything too complicated to hide it.


Breakfast Nook - 6.5' x 8.5' by 8' high at its highest:

This is an addition off the kitchen, also on the back of the house, NE corner. The walls are drywall. There isn't much wall, but what there is, is covered with the same vinyl wallpaper that is behind the stove. It should come down fairly easily. Here is a close-up:


In this room, once the wallpaper comes down, we might need a primer and two coats of paint, probably also yellow, but maybe paler than the kitchen. None of the trim is to be painted, nor the ceiling. 

This is a simple room to photograph. Standing by the sink in the kitchen, I am looking back into the kitchen on the right, breakfast room on the left.


Through the door into the breakfast nook.


And then, in the breakfast room, here's the back door, and then just panning around left:


Hall and Stairwells:

There are two stairwells, both in the back half of the house, the "back" stairwell off the kitchen and the "front" stairwell off the dining room.

The stairwells are 12.5' high at their highest point, 8.5' deep. The upstairs hall is 20.5' long and 3.5' wide with a 7.5' ceiling. None of the trim will be painted, but the ceilings will.

This is also pretty simple to photograph. We'll go up the back stairwell, from the kitchen, which you've already seen:


And look back down. This stairwell has a turn. The other doesn't.


Then from the top, looking down:


At the right side:


And the left side. This wall is drywall. Everything else is plaster.


There are two very minor cracks in the ceiling of the stairwell and some peeling on the exterior wall (which you're looking straight at, in the photo above). Here's a close-up:


Now, we're at the stop of the stair, which is near the end of the hall on the north end of the house, and looking back along the hallway to the south end of the house, where the guest room is:


And a close-up of the hallway walls, which are all plaster but have an odd waffle texture I'm not familiar with:


Now, we're walking toward the guest room at the south end of the hall. There is an angled bit of chimney poking out into the upper right end of this hall:


Here is a close-up:


Beneath that is a bit of cracking:


Now we turn around and look back down the hall, towards the linen closet in the north end of the hall. And here's the cat. Hello Minky.


In the photo above, if you look at the ceiling you can see the line where the paint changes color, right above Minky's head, and beyond that, the trapdoor to the attic. Here's a close-up  of the trapdoor, which is the only piece of trim that needs to be painted:


And here is the line where the paint color changes. We are more likely to go closer to the off-white on the left than the heavy buttercream on the right:


So now, we can look at the front stairwell, which is adjacent to the bathroom. And, conveniently, Minky is looking in the bathroom door. You can see the curved wall they share:


A different view of it, now looking down the front stairwell.


And the angle of the ceiling:


Oh, hello Phantom. Are you looking for Minky?


More shots of the stairwell ceiling, which is hard to photograph. The ceiling and walls here are good and have virtually no cracking and no peeling.


 And now, from the stairs, looking back up to the hall:


But where did Phantom go? Oh, here he is, stalking Minky from under the guest room bed. Minky doesn't like to be stalked.

"Hello, uncle Brooke. Come play with me!"


Thursday, March 7, 2013

Wood Storm Windows 1: First Attempt at Repair

Since I am on a roll (I have written five blog posts sitting here at my desk early on a misty, wintry Saturday morning at the end of February,  cabin fever closing in), I will start one more thread on wooden windows, this one focused on restoring storm windows -- and so finally, I reach the little window that started it all, my baptism by fire, so to speak.

When we moved in, the paint on two sides of the house was in especially bad shape. The side nearest the road had be painted before we closed, for the bank to approve the mortgage. A contractor did that.

We decided we'd handle the rest.

So far, 19 months later, we've painted the back additions ... and, ... I have restored one kitchen storm window.  It only took me a year. At that rate, well, let's just say I'll be dead before they're all done. But, at least this one was in by far the worst shape.

In any case, since I didn't have a blog at that point, I don't have a good "before" photo. Here's the back of the house on our second viewing on February 27, 2011, nearly two years ago to the day, today.

You can see the amazingly beautiful rolled steel roof we had to remove and replace, too. It wasn't the original roof. The original roof (helpfully still underneath the steel roof) was cedar shingle. And beneath that, nothing. Alas, both had to go, and now there is a regular old composite asphalt roof on the house. I wish we had had another decent option, but we didn't. In any case, here you see the back of the house, original kitchen window and storm on the lower right, to the left of the kitchen addition.


And, a very poor close-up of the window. The detail is bad, but basically, all the glazing putty had dried up and fallen out of the storm, and the muntins had lost their paint and warped free of the frame in places, and the window panes were loose and in danger of falling out.

I knew when I took the storm off, to shore up and paint the exterior casing of the window, that it couldn't go back on as is.


So I took it down, took the glass out, marking each piece, cleared the old glazing putty and paint, refastened the muntins,  learning about simple window construction in the process. Then I chiseled the paint away from the rest of the window, getting the surfaces as smooth as possible, and finally, filled the gaps with a regular wood filler in some places and Minwax two-part wood filler in others.** [See note below about wood fillers and epoxy.]

This whole process took maybe a month, and at that stage, right before winter settled in for good, I reglazed the window and, finally, took some photos.


The horizontal muntin here, below, had warped entirely free of the frame (stiles) here, and as you can see, it's now more or less flush, having been refastened and then filled.


The bottom rail, below right, had shrunk away from the right stile here. After clearing most of the old paint, I filled this with two-part wood filler.


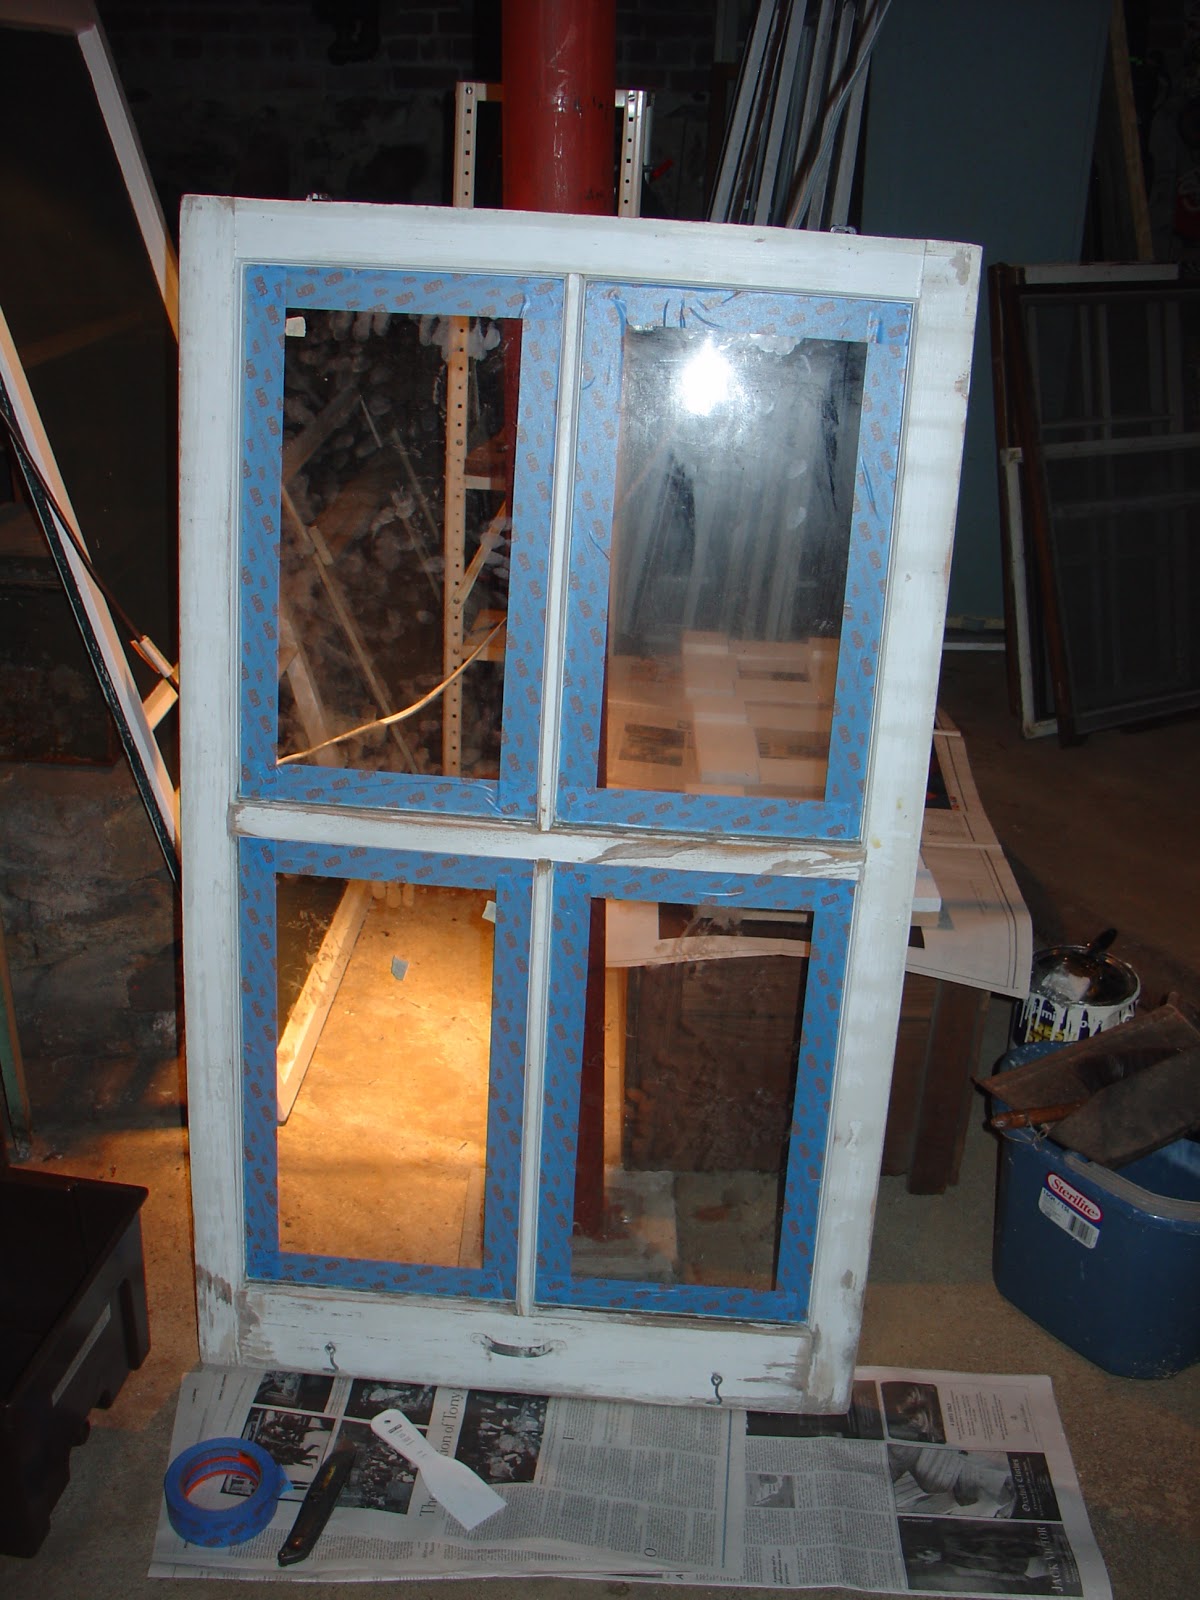
That was the point at which I burned out, despite the fact that it was a relatively small project. And so, the window sat, first in the garage and then in the basement for a whole year, until I was painting the porch column bases this fall. Then I taped and painted it, finally. And took a few more photos, that show its classic storm window construction.

So, this is the only storm window left in the house that has four panes. All of the downstairs storms that are intact are two paned, one up and one down. The upstairs windows all have their storms intact, too, but that's a different matter, for later posts.

So this one is unique. We're looking at the inside of the storm. You can see the metal handle on the bottom rail, that lets you pull it towards you (or push it out for some air).


Here is the inner upper-right corner:


Inner horizontal muntin, right hand side. This didn't need repair:


Here is a photo of the outside of the storm, which was in kinda bad shape. You can see the hanging fasteners, which I've painted with black Rustoleum. It's still totally possible to get a version of these fasteners at House of Antique Hardware, here. And, our Lowe's carries another version, too.


Here's a close-up:


 Bottom left outer corner, where I had to fill the joint between the bottom rail and left stile:


Bottom right corner, again, same deal:


And, some different angles, showing the construction. If you look closely, you can see the join between the right stile and upper rail:


This is a photo of the right side of the storm (right side, if it's installed and you're looking at it from the exterior of the house, that is), showing the classic mortise and tenon joint, where the bottom rail fits into the right stile:


Here you can see the same tenon joint construction where the upper rail is joined to the left stile:


And, one more view of a tenon. I show all these because I haven't seen and can't find any detailed descriptions or photos of the construction of old wooden storm windows, anywhere.


 Here's a shot, being painted:


 And, finally, before:


And -- after:


And last, today, doing its job holding out the snow and mist -- hook and eye holding it snug to the window frame (which, of course, needs to be painted ...).


By the way, I found another blog with very detailed descriptions of the carpentry required to make a storm window that is pretty much exactly like mine here, at the Bytown House blog by a blogger in Shaker Heights, Cleveland -- near where I grew up.


**March 11, 2013 Update: Over the winter, I have done some more research on wood fillers and wood epoxies. I am seeing some reviews that the Minwax two-part wood filler is not a true epoxy and doesn't hold up well over time in exterior uses with northern winters. Abatron seems to be the most used epoxy. A good explanation is on the Minnesota Window Restoration blog here

Tuesday, March 5, 2013

Repair or Replace? Maintaining and Restoring Wooden Windows 1: Print and Online Resources

I have several threads going pertaining to wooden windows, wooden storm windows and wooden window screens. There is healthy debate going on at the moment about the reasons to repair rather than replace old windows. Also, there are three books I've found that are good resources for much more detailed information on repairs than I can give in a blog, so in the interests of helping out other DIYer's, here is the info:

Working Windows: A guide to the repair and restoration of wood windows. Terry Meany. 3rd Edition. 2008.

This is a very, very helpful book, very simply and clearly written for the average, contemporary homeowner, like me, who wants to keep, repair, restore and maintain their old wooden windows. The first chapter covers all the names of the parts and how they are put together, what they do. I found this to be totally invaluable in trying to understand the workings of an old window with layers and layers of paint obscuring the individual parts. Also, there are lots of line drawings. There is one chapter on repairing and making window screens and storm windows. Unfortunately, that chapter is a bit light. I don't know if it would've been enough for my specific needs, when I wanted to figure out how to make screens. I found the book after we made our first screens, so ... uh, thus the detailed blog posts on making screens.


Modern Practical Joinery. George Ellis. 1987 reprint of 3rd edition, 1908.

I love this book. It covers so many details, and was written in an era before power tools existed, so everything feels very contemporary to the handiwork and hand craft of the actual windows in my house. There are tons of line drawings with old names for things. My exact make of windows aren't in the book. Not a huge deal. The bigger issue, from a window perspective, is that George is dealing with all of cabinet making and building related to wood, so windows are covered in one short chapter. Still, its a fascinating book and worth consulting.

Save America's Windows. John Leeke. 2013 edition.

I've just ordered this. When I've read it, will of course provide a review. Leeke has a website, John Leeke's Historic Homeworks, and this book is one of his Practical Practical Restoration Reports. It can be ordered here.


Renovating Old  Houses. George Nash. 2003.

This is also an excellent, helpful book. There is a chapter on restoring and repairing old wooden windows. It deals with epoxy and explains how to reglaze a window, instructions I have already used so often that that page of the book is falling out.


Repair or Replace?

Also, Nash's book deals head-on with the question of whether to replace old wooden windows with modern replacement windows and comes down squarely on the side of repair rather than replacement. There are several paragraphs looking at this issue of whether new double-glazed windows are more energy efficient than old single-pane wood windows.

The upshot, according to this book and numerous authoritative sources online, a single-pane wooden window in good repair with a sturdy wooden storm window and good weatherstripping can be comparable in energy efficiency to a vinyl or aluminum clad replacement and will probably outlast the replacement.

A quick consult today on the web seems to indicate that the balance of opinion is beginning to shift to repair rather than replace. I'll add a few links below on the topic:

National Park Service Bulletin

NPS Preservation Brief, urging preservation over replacement

Community Preservation Coalition

Cambridge Historical Commission


Sunday, March 3, 2013

Crocus is up!

The last of the snow melted this week, and this morning, I took a tour of the yard with the cat. And look!
Creeping thyme still alive on the patio

Hyacinths up outside the studio


Daffodils up in the yard on the hillside

Daffodils up by the well

Hyacinths up by the well

Grape hyacinths and foxglove alive and well by the front porch

Naturalized crocus up by the tree stump (and, by extension, no doubt in the rest of the front yard)

More crocus peering out from under last year's hosta

Saturday, March 2, 2013

How to make wooden window screens 5: Construction

Now we come to the heart of the matter. Making replacement wooden window screens. If you haven't been following along, you can catch up by looking at the previous posts on this thread (the first two are here and here), where I covered the materials needed, how to measure, the design of our original model and some alternates.

In this post, I will demonstrate the first half of the process we used to make our replacement screens. I will try to keep the text to a minimum and the photos to a maximum, but I think this might be a long and tedious post, if you're not actually looking to make wooden screens.

However, since my most popular posts seem to be the long and technical ones that show step-by-step instructions, let's soldier on ...

Okay. After we measured and made sketches, we toted up the amount of each kind of lumber we needed and went to the lumber store. As I mentioned in my post on materials, we used poplar. These first screens we've made are sheltered under the front porch, so I'm not too worried. But in subsequent digging around and research, I've learned that poplar, while an excellent wood for interior, painted trim, does not last long in exterior uses. So, don't use poplar! High grade of pine or cedar seems to be the consensus, from my reading.

That brings up the question of print resources, and I will do a post next on the books I've consulted.

Anyway. After we went to several lumber stores, ordered things that were not in stock, etc. etc., finally one day we went down to the basement and started sawing.

Here is the basic order we followed:


  1. Miter cut four pieces of lumber to the right lengths for each frame
  2. Rabbet out the inner front edge of each piece of frame lumber
  3. Glue the frames together
  4. Check each frame to make sure it fits its intended window
  5. Fasten the corners with dowel rods
  6. Cut and add the "projection" to the back, on the top
  7. Put the frame in the window and mark and drill holes for fasteners (if using)
  8. Fill, sand, prime and paint the frames
  9. Cut and prime and paint the trim pieces to cover the screening on the front
10. Put the screening in
11. Nail the trim over the screening
12. Put in the fasteners and install the screens


First and foremost -- take your measurements, then figure out the measurements for each cut you're making. Check and double-check. Write it down. Sketch it out if you need to. Here are two examples of our rough sketches:


1. Miter cut four pieces of lumber to the right lengths for each frame

Okay, if you  have a snazzy power miter saw, this will be easy. If not (like us), buy the cheap, plastic miter box and saw at your local hardware store and do some practice cuts on spare lumber.

Then double check all your measurements and cut four pieces for the frame of each screen.


If, like us, you're making more than one screen, here's your chance to get all factory-floor efficient. Make all your mitre cuts at once, write what each piece is with pencil on its side, rubber band them together and get this step out of the way before moving on.


2. Rabbet out the inner front edge of each piece of frame lumber

If you don't know what a rabbet is, wikipedia has a decent basic explanation. I had no idea what rabbet meant when we started, so never fear.

When we were in one of the lumber stores, we fell into conversation with a contractor. We thought we would have to buy a router and order a specialized router bit to rabbet out this piece. We were trying to figure out which kind of router bit. And the clerk said to someone standing there, "Tom's a contractor. Ask him." Tom asked if we had a table saw.

"Yes," we said, tentatively ... it was sitting unused in the basement and we'd never even tried plugging it in.

"If it was me," he said, "I'd throw it on the table saw and ..." I can't remember the phrase he used, some contractor-y language that means cutting out that bit.

What could it hurt to try? we thought. Then it turned out to work. Well, that is easier said than done. Lots of practice and repeated measurement and a lot of not too overly heated conversation between the two of us was involved, let me tell you. But, in the end, we had a system.

We cut one edge of the rabbet with one pass. Here you can see four pieces for one frame:


And here, all the pieces for several screens (six, to be exact):


Then we re-set the table saw and made another pass, from the other side, and voila, a rabbet:


Bunch of rabbets. Herd of rabbets. Pack of rabbets.


I will point out that we checked after the FIRST one, with the trim, as you see below, to make sure we were at least in the ballpark. We did pretty good. We also checked them all, as we went, and sometimes they'd go out of true or the table saw would push a piece of wood up and we'd have to go back and do it over, or do several over, if we got on a roll and got several wrong at once ...


So, that was fun. Sometimes Capel just got out the hammer and chisel and chiseled them down. But in the end, we had a bunch of rabbets.

3. Glue the frames together

So then, we, well -- first we tried to use those corrugated brads. They look so innocent. Fortunately, we tried out this exercise on spare bits we'd practiced on with the mitre saw. Not on any of our so carefully rabbeted bits. Cause this is the havoc that resulted--or, anyway, this is the example we kept to remind ourselves,  ...


Not possible for us to do.

That was when Capel made a uni-lateral decision that we would glue them and then dowel-rod them together. I just shrugged. I was having even less luck than he hammering in brads, so I didn't have a leg to stand on. (Oh, by the way, they're actually called corrugated fasteners, not brads. I don't know why brad sticks in my head. I think my father called them brads.)

So then, glue. It's actually not hard. The important things are to have four of the right clamps, try to get the frame as square as possible in the clamps, and don't use too much glue or wipe off the extra before it hardens:


Here's where the factory-floor process begins to bog down. The glue has to harden overnight. And with only four clamps, we could only make one frame at a time. And then we'd get out of sync and not make them in the middle of the week ... and only get one done a week, so this part took us a few weeks. A month? I can't remember. It went on. And on.

And that was where I evidently stopped taking photos. So, unfortunately, the rest of the step-by-step instructions will have to wait. I think if you've made it this far, you can probably do the rest on your own. Go free, little DIYer, go free.

Or, you can wait until we make our next screen. Should be soon, sometime this spring. Cause we've got a passel more to do. And then I will finish this thread with photos.


____________________________________________
For the entire series on making wooden window screens, click on the category "How to Make Wood Window Screens Series", in the Topics list along the right-hand side of the home page. There is also now an index tab at the top of the home page, listing all the posts in sequential order, with a link to each one.