Friday, September 27, 2013

Where did the well come from? Comparing earlier photos of Pugsley's southeast corner

I've been doing a repair on the southeast corner of the house, which has sustained a bit of moisture damage from the downspout on that corner. Last week, we had new gutters and downspouts installed, and rerouted the downspout away from that corner entirely, because there is an old well up against the house, with a slight hill next to it that brings the level of the ground right up near the siding of the studio addition on the back of the house and just creates a difficult drainage problem no matter how good the downspout is. 

Here's a close-up of the well and garden around it. 


I remembered seeing a photo of the well from an earlier period when a tree was there, and went hunting  up old photos of that corner of the house. Here's the well with the tree. This kind of square photo with rounded corners is probably 1970's vintage or so.


And I, of course, along with everyone else, has assumed that the well was there before the house, or is at least contemporary with the house and dug before the studio addition, because it is smack up against the addition -- not an ideal location.

But, lo and behold, in a photo that looks to date from the early 20th century, there appears to be no well! Is there a well there without the two-foot high stone wall or curb around it? I really can't tell.


Just for comparison purposes, here is an even earlier photo, from a time before the road along the south side of the house was there, or perhaps the road is there but not paved. Unfortunately, the angle is such that you can't see the well area.


And, here we are again today. Well, did that well come from? Another Pugsley mystery.


Sunday, September 8, 2013

Underneath its skin: Pugsley re-siding in 1963

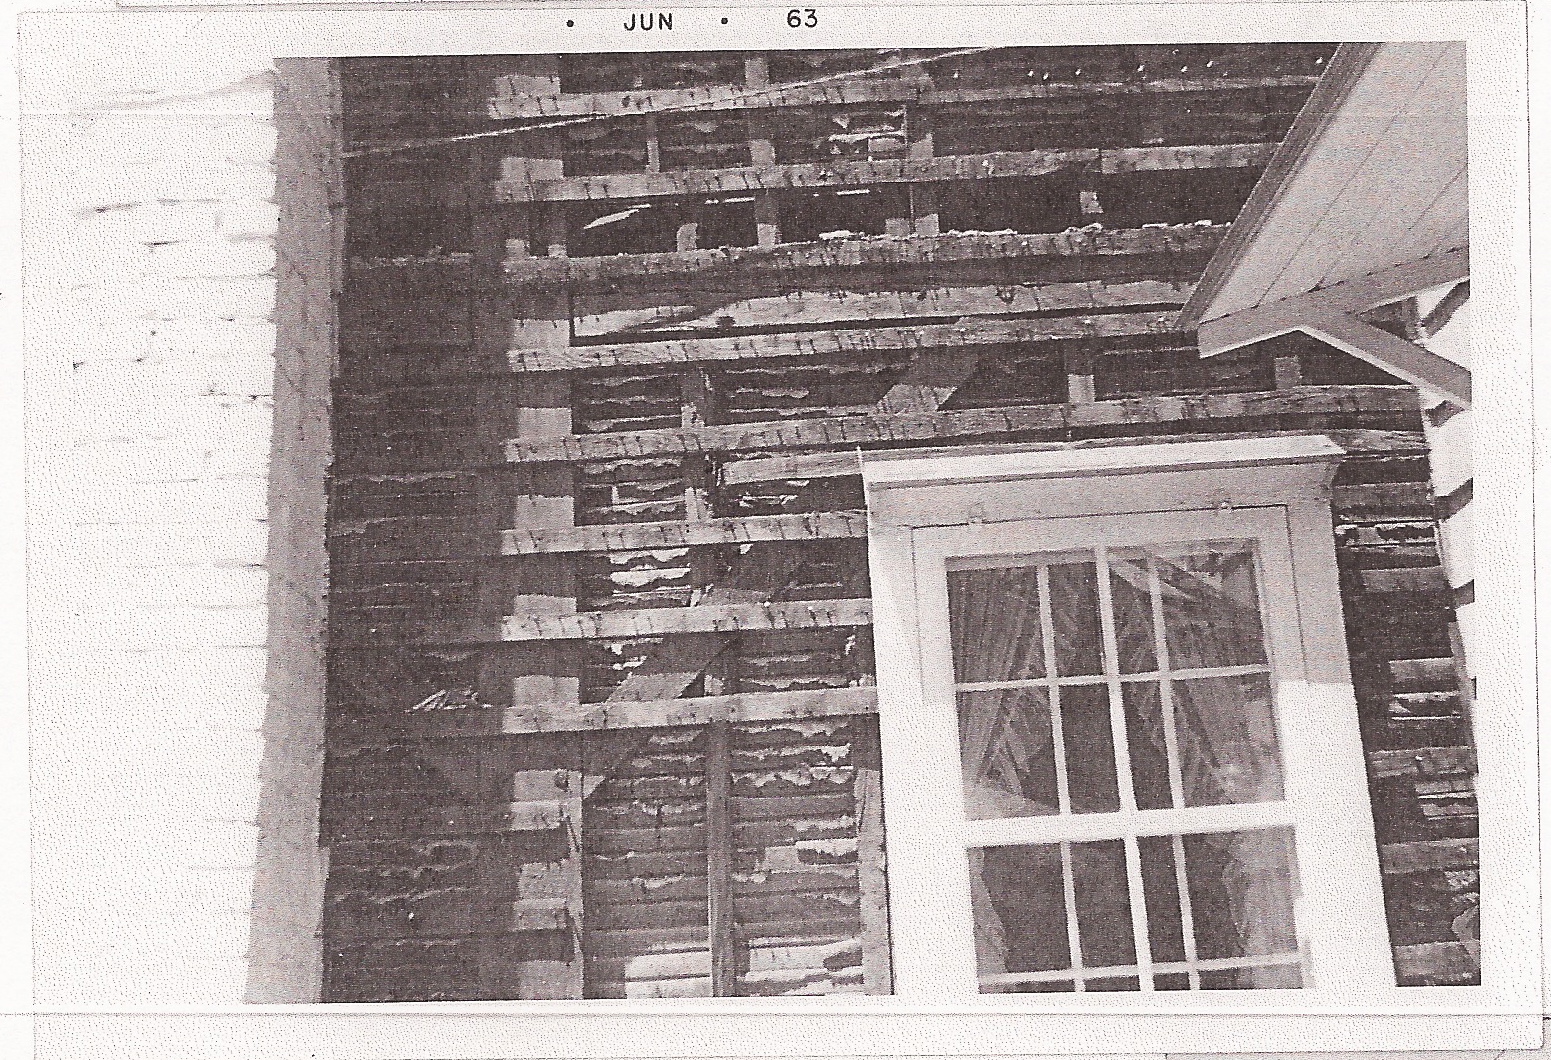
I'm working on my first siding project, a very small repair of one tiny corner of the house. And in trying to understand the construction, I went digging around in photos the former owners left. These photos below are a little grainy, because I am working from xeroxed copies, but they're still very interesting. These are photos from June of 1963 (the month I was born), when the house was last sided. 

The photos illustrate two important factors of the older construction methods used on this house.

First, the house has a kind of "skip-sheathing" underneath the cedar shingle siding -- little strips of 1x2 furring or nailers in horizontal lines, that the shingle siding is nailed to. Here are two photos of the back of the house, showing the skip-sheathing clearly.


This creates an airspace between the lathe and plaster wall and the shingle siding, which lets the house breathe. I think it is an important component of the longevity of this house. Here is an article that explains, in somewhat more technical terms, why.

Two, in places the house has two layers of siding. Here below, you can see the new siding being nailed on top the old. 


The house is unusually airtight and energy efficient for an old house, and I think both of these things contribute to it, as well as the thick plaster walls, the 1830's window construction made without pulleys and ropes, and the storm windows on top of that. 

We had an energy assessment the first winter we were in the house--one of those free ones that companies offer, to sell you things like blown-in insulation, re-siding and replacement windows--, and the guy kept wandering about all confused because he couldn't find any major temperature variations at the window trim or electrical outlets. All houses have little draughts, he kept saying. Ours doesn't. He couldn't find anything to suggest, not even window replacement.

And yet, there is no foam insulation or wrapper, nothing "artificial". No modern materials. I'm not one to valorize older materials simply because they're older, but I do feel that old house building methods have stood the test of time, are proven to last and are worth taking the time to understand and replicate when repairing an old house.


Saturday, September 7, 2013

Where has all the crabgrass gone? Update on eliminating crabgrass from the patio

It's only been a month since my last update, but I am very happy to report total SUCCESS on one of my many ventures this summer. There is no crabgrass on the patio. Where has all the crabgrass gone? You may ask yourself.

Into this bucket!


This was the last of it. And believe me there were many such buckets all summer long. This last one was captured on August 15 and I am pleased to report that today, September 7, 3 weeks and 2 days later, there is still no crabgrass. I have gotten out ahead of it -- for about 3 minutes.

You can track the allies who came to my aid on the various posts on this topic under the topic "patio crabgrass" to the right of the home page. But a picture is worth a thousand words they say, and here are the photos.

Patio back to front and side to side, this past weekend:


Close-up of the worst side:


You can clearly see that there are indeed other weeds on the patio, such as this interesting creature:


The friendly weeds are a part of the defensive strategy and except for a few clover are much easier to root out than crabgrass. I also have "friendly fire," so to speak, in the form of several different types of thyme. Here is how they have fared.

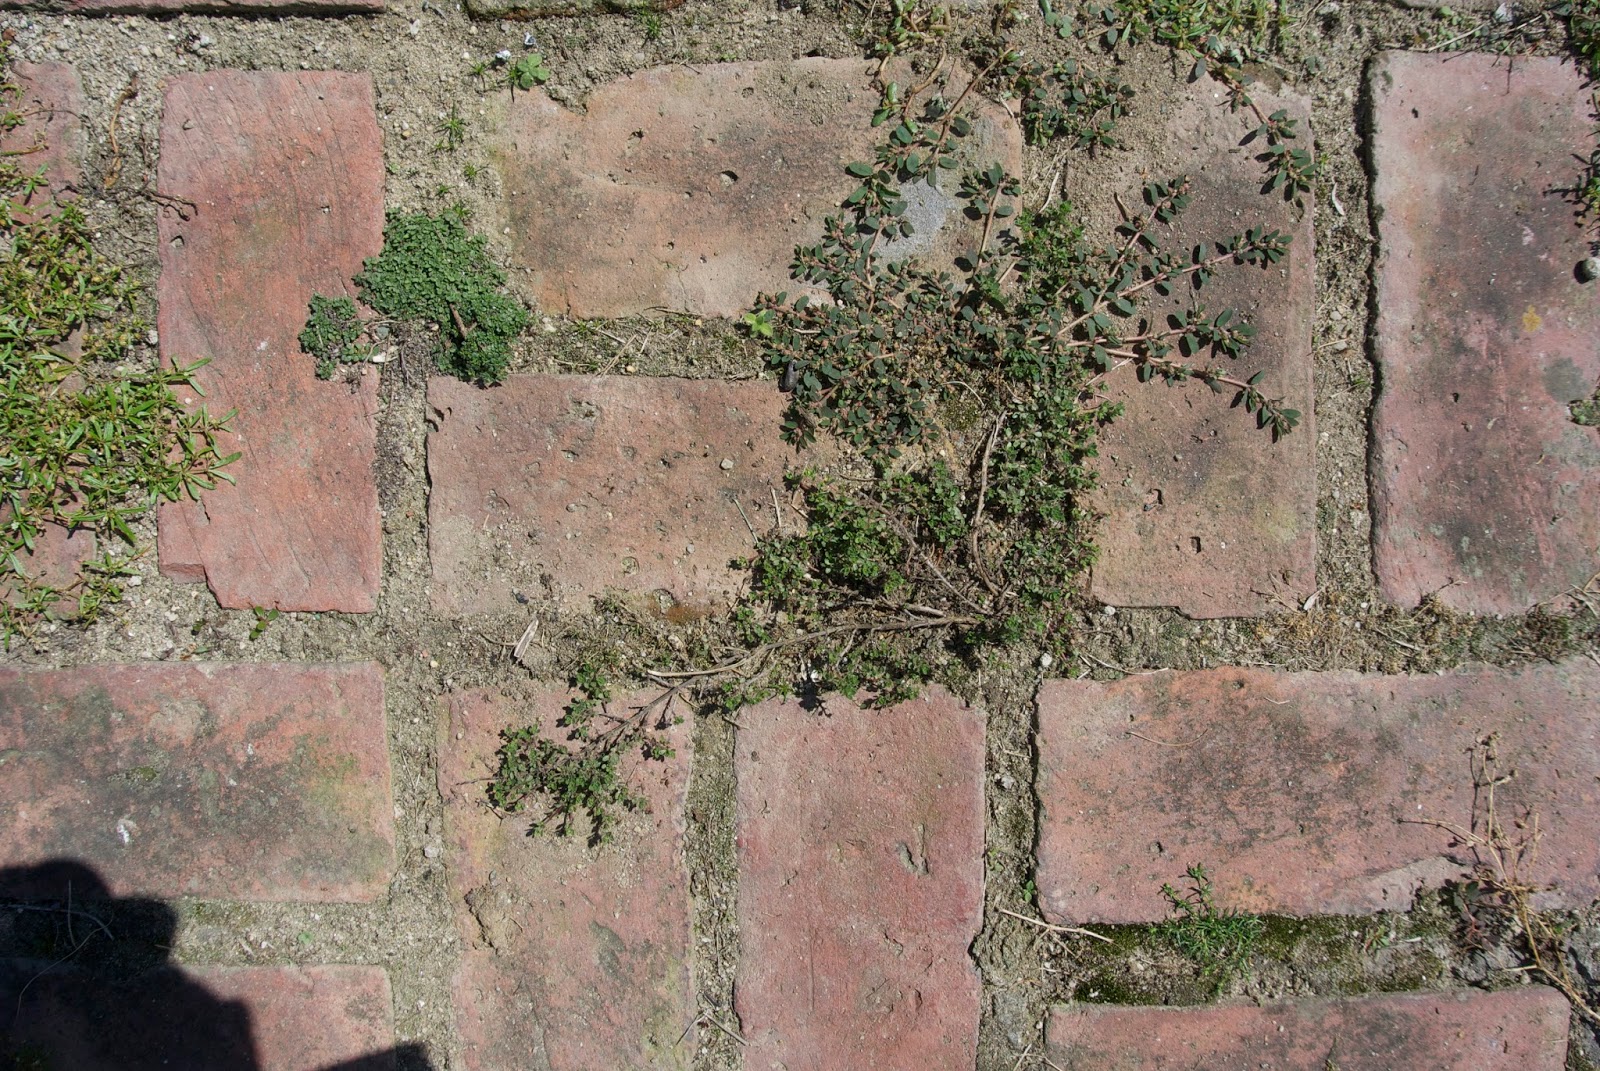
Creeping thyme, which went in last September. The difference between its growing over bricks and between bricks seems to be light foot traffic. A bit of foot traffic seems to confine it to the places where it is rooted. Not totally sure, because these bits don't get much foot traffic.


Wooly thyme, planted this June or so. So far, the tendency of this one is to mound up into a circle, rather than creeping along between bricks. I haven't  made up my mind about this one.


Pink chintz thyme, just planted a few months ago. This spreads very rapidly with long runners. You can see them in the second photo. It also blooms in late summer (rather than early summer like the rest). It's pretty and a welcome addition.


Mint thyme. These were planted about this time last year. This mounds, too, and so far most of what I've planted has not really put out shoots along the nearby cracks, though you can see in the lower photo a mint thyme that is starting to grow out perpendicular fashion. Also, it tends to die out easily from the center when it is too dry or gets foot traffic, so the jury is out on this one too.


Minus thyme. People say this is a low grower, but the bit I planted has mounded. Jury is still out on this one.


This photo shows two types growing in two different ways -- I really don't know which variety either of these are. Ultimately, part of my thought is just to introduce enough diversity that the patio gets populated by thyme, period, rather than crabgrass.


And, the winner by far: elfin thyme. This confines itself to the cracks between the bricks and tolerates heavy foot traffic. The one drawback, it grows unbelievably slowly. These bits have been in place for more than a year.  So they're not much competition for the crabgrass, and won't be for a long while, most likely. Still, I have decided, when I get the time, to order plugs of this variety and plant them all over the entire  patio and let it take its time to fill in.


Finally, for wet and shady spots, this little creature named Corsican Mint (a mint, not a thyme) is settling in quite nicely. It dies back anywhere there is too much sun or not enough moisture, but in several shady, protected areas of the patio it has not only survived the month-long drought of July, but even prospered. The only hesitation is that some of my research indicated it might be an aggressive grower, like all mints, and so I am waiting to see whether it is able to co-exist nicely with my other shade denizens or not.


Monday, August 26, 2013

Building a low-profile media center with trolley wheels and reclaimed wide plank pine top

It's been a busy month, and I haven't posted as much as usual, because the weekends have been fine and full of work. We are now working on six, count 'em, SIX house projects at once (not counting gardening)! This post describes the only finished one (well, nearly) -- a media cart that Capel designed and built for our living room. 


As you can see, the cart is narrow and low, to fit neatly in the corner. It's long enough to fit the TV and a laptop next to it for streaming, with the cable box and speakers on a shelf below. It has a convenient, hidden tray in back to keep the cords neatly out of sight. And the top is made of reclaimed wide plank pine we took up when we renovated the bathroom. So it has a special connection to the house, as well.

It's a beautiful, useful piece and took Capel only a few weekends to build. It's described below in detail with lots of photos. 

Meanwhile I have been working on much less sexy work: painting and painting and painting endless screen frames ...


Oh, wait, two more!


But enough about that. Here is the design and build of the cart.

The idea started because we now watch so much TV streamed from our laptop. But our old 60's style TV table had no room for the laptop, which routinely sat on the floor. Very awkward for working with. I'd had my eye on some beautiful media carts/entertainment centers at places like Pottery Barn, built with old trolley wheels and in various farmhouse-type styles made of heavy wood. They're not cheap, though, and when I showed Capel my idea, he said, 'Oh, I can build that.' Turns out, he could.

We started by hunting for wheels. Then I had the idea of using the wide plank pine flooring we'd taken up from the bathroom for the top. And that started the ball rolling, in terms of design. He fooled around with several options, and we settled on the one you see above. Here are the final two drawings:


After we'd decided on a design, Capel spent some time at a couple of lumber places to find wood to match the pine. He came up with cherry, which here you see together with the pine, which has aged to a beautiful patina. We finished a tiny bit of the cherry with a test finish of tung oil, which brings out the cherry color much more clearly, and makes it even closer in finish to our pine. But I still haven't tested a finish on the leftover pine, so that is yet to come ...


We decided to use the back of the pine (the side that was laid down on the joists), rather than the face that had been up, because in the 100 years or so that it was essentially serving as the subfloor for the bath, after having spent nearly 100 years as a bedroom floor, it got pretty beat up and is a dingy grey color. The backside, on the other hand, is an amazingly beautiful natural aged reddish brown, pretty much exactly like the floor of our living room, where the finished piece will live. Capel glued two of the tongue and groove pieces together to form a plank wide enough for the top. We fitted it together so that the paler marks of the joists match up -- to us that is more aesthetically pleasing.


I am not going to sand it, because it would destroy the patina and color, so I'll just brush it with a steel brush lightly and probably apply some sort of tung oil or beeswax finish. I've done some initial research online, but still have testing to do on the leftover pieces.

In any case, once that was sorted out, and the wheels were ordered, Capel started putting the base together. Here are the main pieces, cut and assembled:


He used pocket holes on the inside of the frame, to make the joins. Pocket holes are a quick, easy way to create solid joins, and because of the design, the pocket holes are completely hidden from view and didn't even need to be filled. Here you see them being made. There are lots of detailed instructions for using this method on YouTube.


And here is the basic box of the base assembled, with an inner frame on the bottom to accommodate two wider planks of the same cherry to make a lower shelf. The notches in the top of the back top rail are for cords, and just back of that will be a little "tray" made of the same cherry wood, large enough to hold a power stick and all the leftover power cords and cables.


And here is a shot that shows the lower shelf laid in. The lower shelf is for the cable box, speakers, etc.


And, here it is fully assembled and in place this morning. Here's a side shot, showing the wheels and how the tray works, in the back. Also, you can see it was designed to sit just below the windowsill, and narrow enough for us to move around easily.


A shot of the tray, with the power stick and cords in it.


The wheels ... we were thrilled to see that it really does roll, effortlessly!


And, the top, every bit as beautiful as we imagined it.


And, in situ, again. 


I still have to finish it with some sort of oil, but I want to do some tests first and we couldn't wait to bring it up and start using it, the minute it was all together! 

This turned out better than we both imagined.  One thing I really like about the design is the way the faces of the cherry on the front and side really minimize all the equipment loaded into the bottom shelf. It's there and easily accessible. The sound is great. But you really just see the cart, not all the unsightly electronics equipment.

So there you have it. Capel's media cart.